


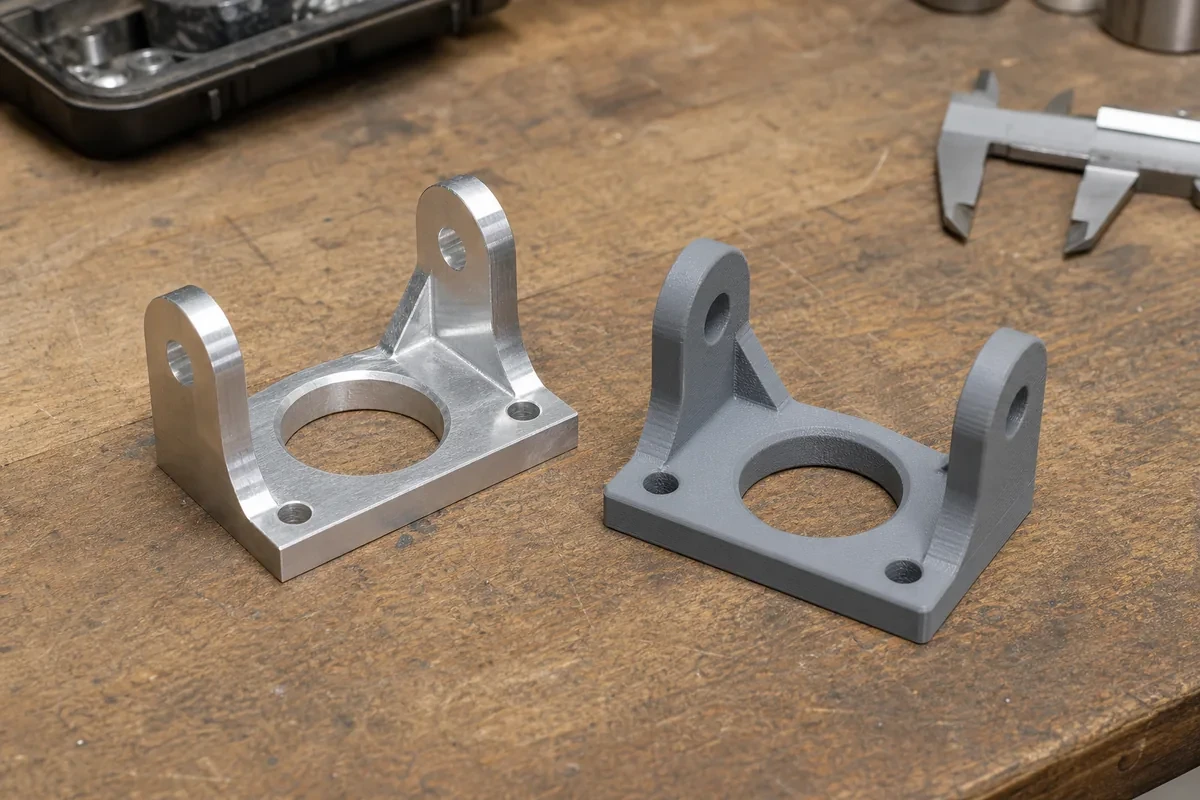
Every prototyping conversation eventually reaches the same question: machine it or print it? The answer sounds like a volume threshold, and people quote one — "below 50 parts, print". That number is wrong as often as it is right, because cost is not the only variable and printing is not one process.
This is a cost model with real numbers, the four cases where the crossover moves, and the properties that decide it when the arithmetic is close.
Machining has high setup and low marginal cost. Programming, fixturing and first-article inspection dominate at quantity one, and each additional part adds only material and cycle time.
Printing has low setup and linear marginal cost. There is no fixture and no program, so part one is cheap; but every part takes the same machine time, so the hundredth part costs almost exactly what the first did.
| CNC machining | 3D printing (SLS/MJF) | |
|---|---|---|
| Setup cost | $150–600 (program + fixture + FAIR) | ~$0 |
| Marginal cost per part | Material + cycle time | Material + build time |
| Cost curve | Steep fall, then flat | Straight line |
| Minimum practical quantity | 1 | 1 |
| Dimensional tolerance | ±0.05 mm typical, ±0.01 achievable | ±0.3 mm typical (SLS), ±0.1 mm (SLA) |
| Material properties | Isotropic wrought metal/plastic | Anisotropic, layer-direction dependent |
Aluminium, six pockets, four threaded inserts, one sealing face. Machined from 6061, printed in SLS nylon (glass-filled for stiffness). Prices are typical for a Chinese supplier shipping to the EU, excluding freight.
| Quantity | Machined (6061) | Printed (SLS PA12-GF) | Cheaper |
|---|---|---|---|
| 1 | $180 | $95 | |
| 5 | $310 ($62 ea) | $420 ($84 ea) | Machine |
| 20 | $520 ($26 ea) | $1,600 ($80 ea) | Machine |
| 50 | $900 ($18 ea) | $3,800 ($76 ea) | Machine |
| 200 | $2,600 ($13 ea) | $14,000 ($70 ea) | Machine |
The crossover here is between one and five. That is faster than most people expect, and it is typical for a part of this size: setup amortises quickly when cycle time is 20–30 minutes, while SLS cost per part barely moves.
The printed part is only cheaper at quantity one because there is no setup. As soon as setup is spread over five parts, machining wins on pure cost.
A 400 mm part may not fit a printer's build volume, or may need to be split and bonded — which adds cost and a weak joint. Machining a large part is proportionally more expensive, but printing it may not be possible at all.
A 10 mm clip costs $2 to machine at 1,000 pieces and $1.50 to print. Printing wins until the tooling cost of injection moulding appears — but between printing and machining, printing holds for tiny parts at high volume because machine time per part is seconds.
A bore that must be H7, or a face that must be flat within 0.02 mm, will need post-machining after printing. That secondary operation adds a setup and usually a fixture, at which point machining the whole part is competitive.
Aluminium, stainless and titanium are machined. Nylon, resin and TPU are printed. When the material is genuinely interchangeable, cost decides. When it is not, the process is already decided.
Cost comparison is only meaningful when both processes produce a part that works. Three property differences decide that:
That is why the honest rule is not "print under 50" but "print when the part is a shape check, machine when the part must behave like the production part".
Printing: support removal and surface finishing (bead blasting, dyeing) add 10–30% to the per-part cost and often a day to the lead time. Threaded inserts must be heat-set or glued, which is a manual operation.
Machining: the setup cost quoted is not the whole story — a design change after the first article means the program and possibly the fixture change, at 30–60% of the original setup. Printing absorbs design changes at zero tooling cost, which is a real advantage during iteration.
That last point is the strongest argument for printing in development: not the unit price, but the cost of being wrong.
There is a third option between printing the whole part and machining it: print the body and machine only the features that need tolerance. On a housing with one sealing face, two bearing bores and a cosmetic exterior, that can be the cheapest configuration at low volume.
The arithmetic: a printed body might cost $60 and the machined version $180 at quantity one. Printing the body and machining the three critical features costs $60 plus a $90 setup and $15 of machine time — $165, barely cheaper than machining the whole thing. The economics only work when the critical features are few and accessible, and when the printed substrate is stable enough that the machined features stay where they were cut.
That last condition is the catch. A printed polymer creeps and absorbs moisture, so a bore machined into it can move by more than its tolerance over a few months. The hybrid works for prototypes and for parts where the machined features are not dimensionally critical in service; it does not work as a substitute for a machined production part.
Where it genuinely wins is when the geometry is un-machinable — internal channels, lattices, organic shapes — and only the interface features need precision. Then printing is not a compromise, it is the only route, and machining the interfaces is a finishing operation.
Cost comparisons usually stop at the invoice. Time is the other half of the decision, and it moves in opposite directions for the two processes.
| CNC machining | 3D printing | |
|---|---|---|
| Quote turnaround | 1–3 days with a complete package | Hours, often automated |
| First part ready | 3–7 days | 1–3 days (SLS), 2–5 days with finishing |
| Design change impact | Program and possibly fixture rework | None |
| Repeat order | Fast, program exists | Same as first |
The pattern explains a common behaviour: teams print the first two iterations because the loop is fast, then machine once the design stops changing. The printing cost per part is higher, but the two weeks saved in iteration are worth more than the price difference.
The mistake is the reverse — machining a design that is still moving, then paying for program changes on every revision. On a project with three iterations, that can cost more than the entire printing bill.
One more timing effect is worth stating: printing scales with volume in wall-clock terms only if you have one machine. A build that takes 20 hours produces a tray of parts at once, so ten small parts may arrive in the same time as one. That tray effect is why printing can beat machining between 10 and 40 pieces for small parts, even though the per-part arithmetic says otherwise.
For a part with 20–30 minutes of cycle time, usually between 3 and 8 pieces. For a large or complex part with an hour of cycle time, it can be 15–25. There is no universal number; the crossover is where setup divided by quantity falls below the printing cost per part.
Yes, and it is a common hybrid: print the body, machine the sealing face and the bores. It works, but the printed substrate is soft and dimensionally unstable, so the machined features are only as good as the print underneath.
Per part, often yes for small parts, but SLA resin is brittle and not representative of a production plastic. Use SLA for appearance models and SLS when the part needs to survive handling and light load.
Only if the material and tolerance suit it. For 20 units a year of a non-structural bracket, printed parts can be the right answer — but be honest that you are accepting creep and anisotropy as part of the design.
Printed parts need bead blasting or dyeing to look acceptable, which costs $3–8 per part. Machined aluminium can be used as-machined or anodized. The finish cost often closes a gap that looked like a printing advantage.
Printing wins at quantity one and wherever the geometry cannot be machined. Machining wins from about five parts upward, and by a wide margin at fifty.
The number that matters is not the crossover — it is whether the prototype has to behave like the production part. If it does, print it as a shape check, then machine the real thing. The full process comparison for prototyping is in the prototyping materials guide, and the volume economics against moulding are set out in the moulding break-even analysis.
